Send email from your domain with gmail
Mailwip supports SMTP server with professional and Business plan. If you are on "Individual plan", consider to upgrade to make use of this premium featurs or use gmail as a work-around.
If you use gmail, you can configure it to send email from your own domain via their "Send email as" option using gmail smtp. Here are the steps
Pre-requirement: Allow gmail to send email through your domain
Update your SPF record(the TXT record that start with v=spf1 to:
After that, you're ready to let gmail handle email sending.
1. Enable app password
Go to Manage your google account page at https://myaccount.google.com/apppasswords You may have to enable MFA before you can use this app passwords feature
2. Generate an app password:
You can select Custom app/Custom Device(doesn't matter, it's just a way for you to remember what this app password is for)
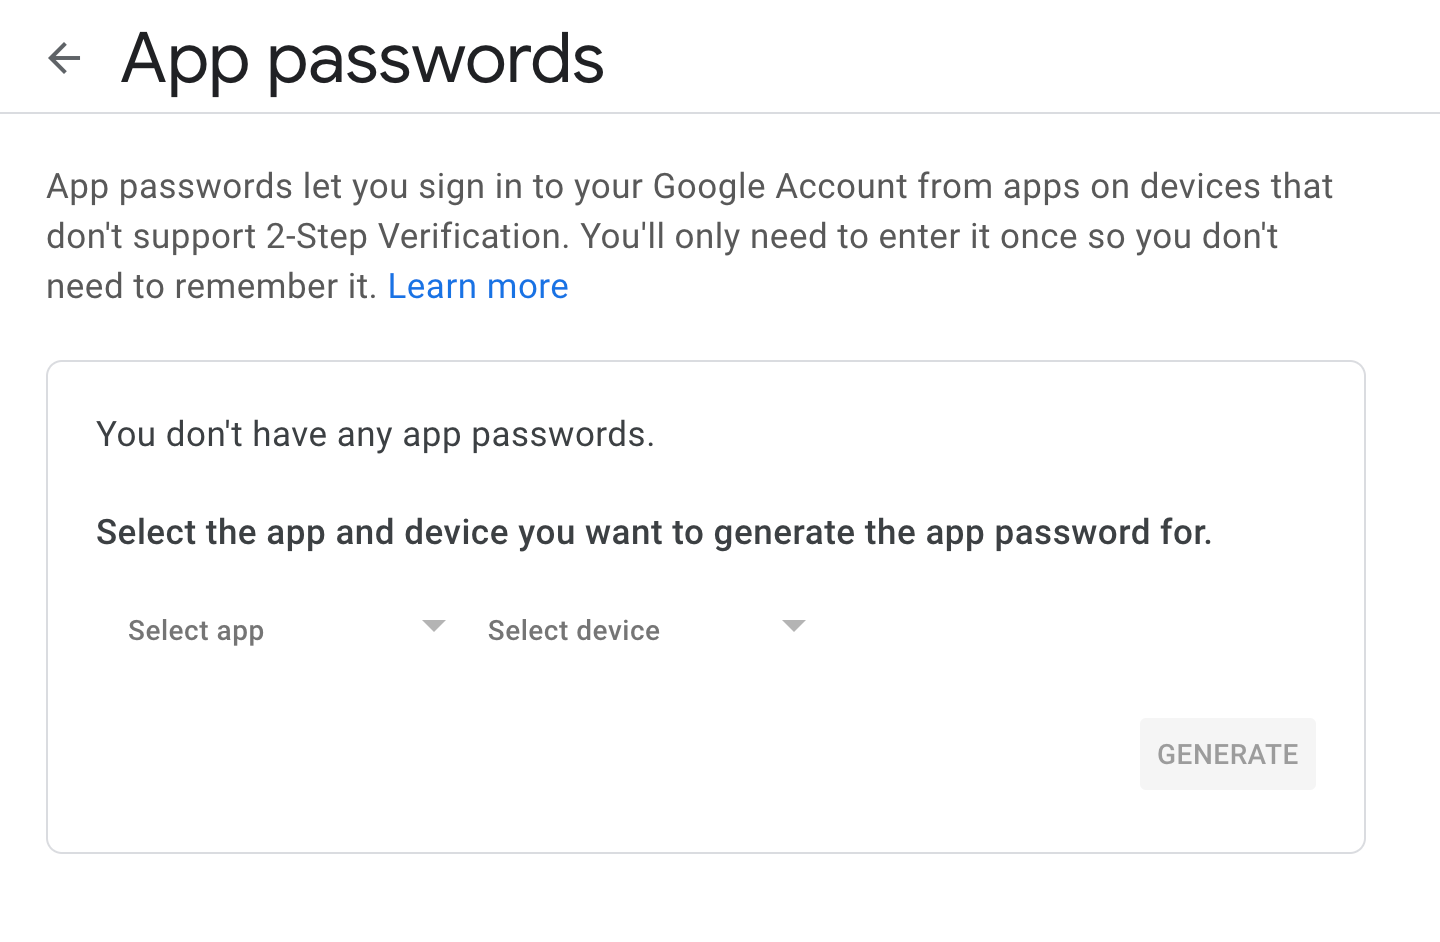
Click generate and keep that password somewhere. You will need it in the next step.
3. Configure Send mail as
Now, go back to gmail setting at https://mail.google.com/mail/u/0/#settings/accounts and go to "Send mail as" section:
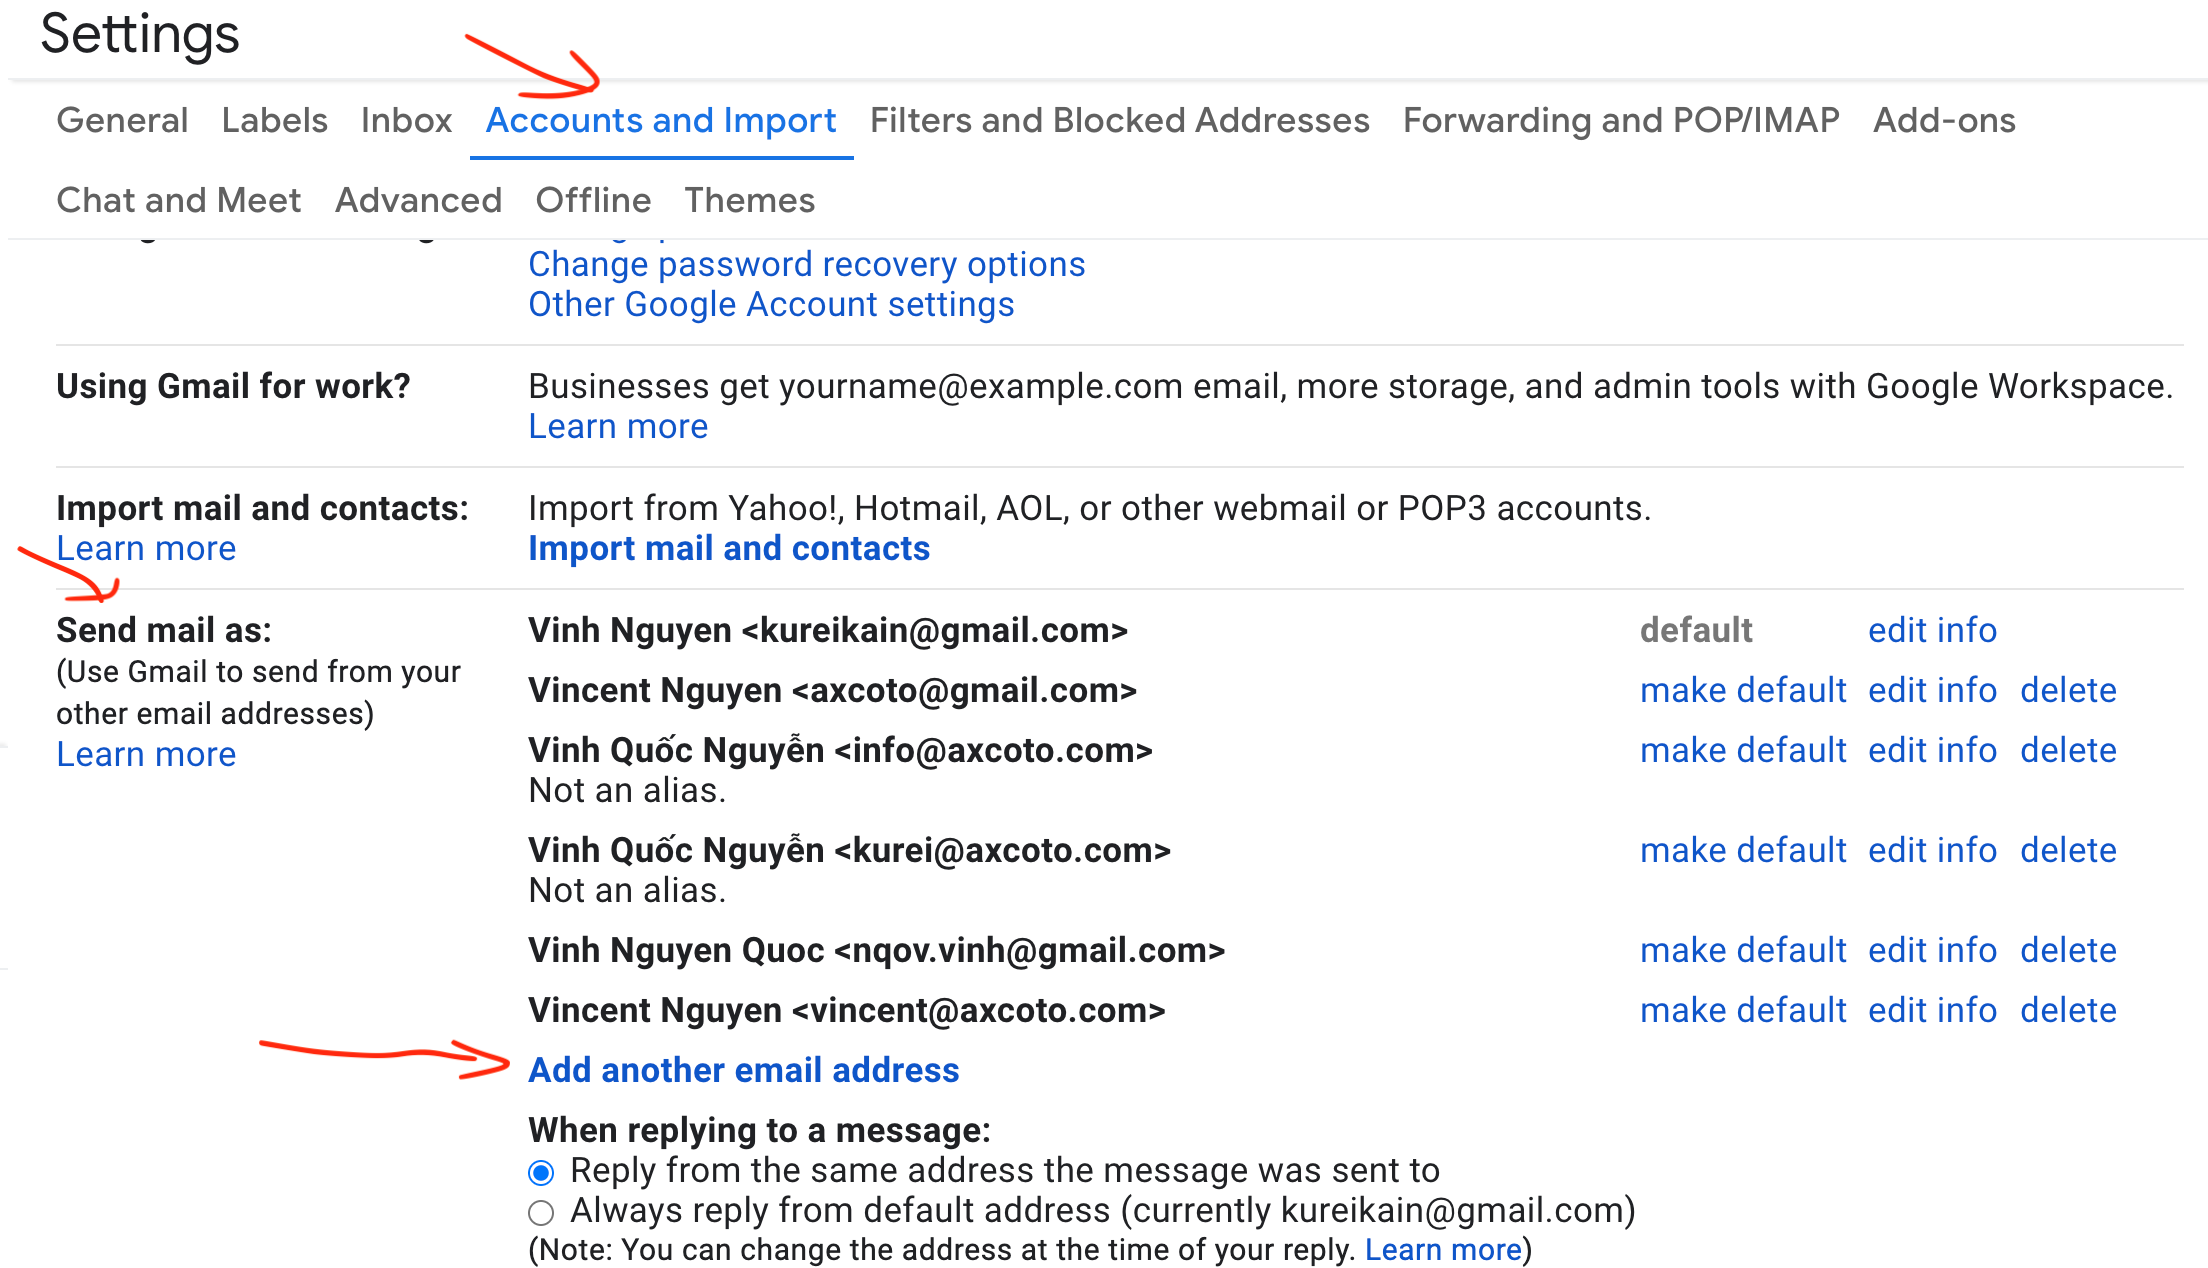 Click on "Add another email address". Here is trickiest part.
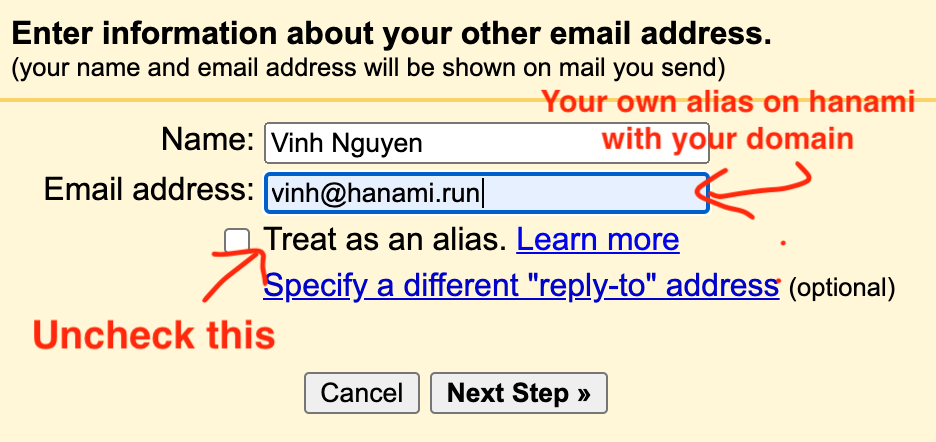
Enter your name and your alias (can be anything) such as yourname@your-own-domain-that-are-on-mailwip.com and Uncheck "Treat as an alias" then click "Next steps":
 .
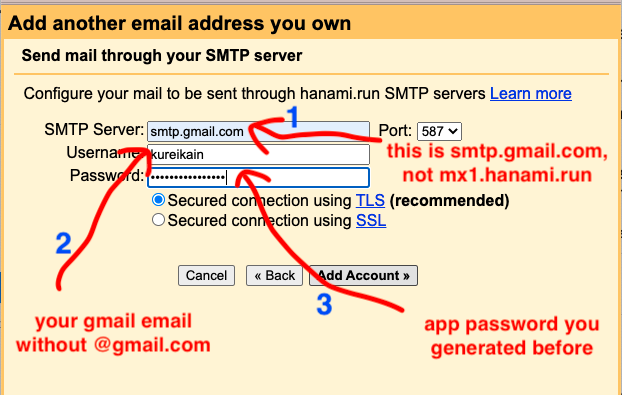
In next screen, Clear out any pre-fill data and re-fill the form as below:
.
In next screen, Clear out any pre-fill data and re-fill the form as below:
SMTP Server smtp.gmail.com.
Username: Your gmail username
Password: The app password that you generated ins tep 2.
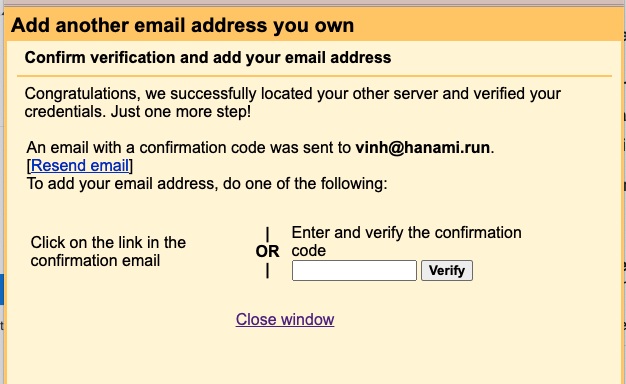
Click "Add Account". You will see this screen next.
 .
.
Check your email and enter the confirmation code, then click "Verify" and you're done
 .
.
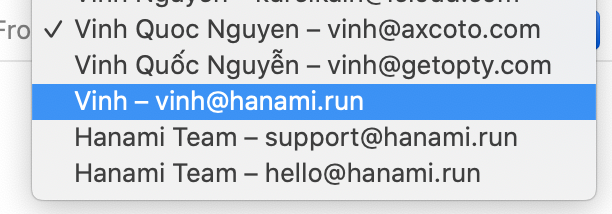
4. Send email using your alias
Now when sending out email, gmail will give you option to pick the "From address" like this:
 .
.